How to make a wooden pendant at home? – Well, this is one of the most awaited questions asked by beginners wanting to start the easiest way possible. This tutorial will surely help you.
The first step is to collect leftover wood pieces as they are a wonderful treasure for us as artists. Get the desired wood shapes from a carpenter or laser cutting machine.
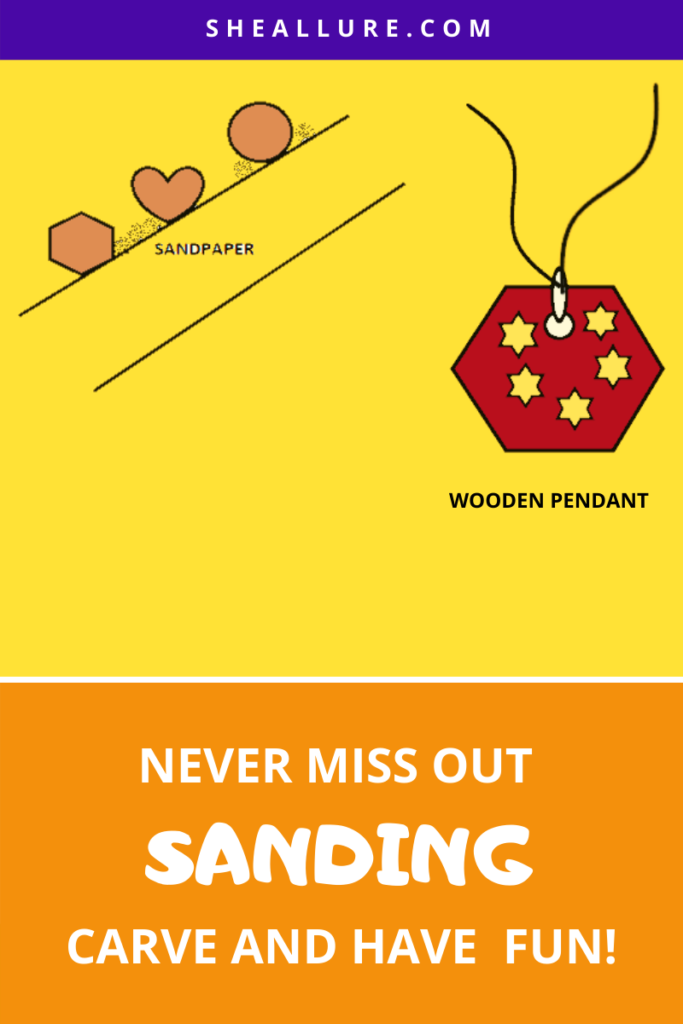
Turn the unfinished wood shape into a fine piece. Rub it thoroughly on the sandpaper until the rough edges of the wood are completely gone. You can also purchase the finished wood shape from the craft store.

How to Make a Wooden Pendant at Home?
How to make a wooden pendant at home? for yourself that will make a bold fashion statement. The whole idea behind this tutorial is to use recycled wood pieces that look awesome with any outfit.
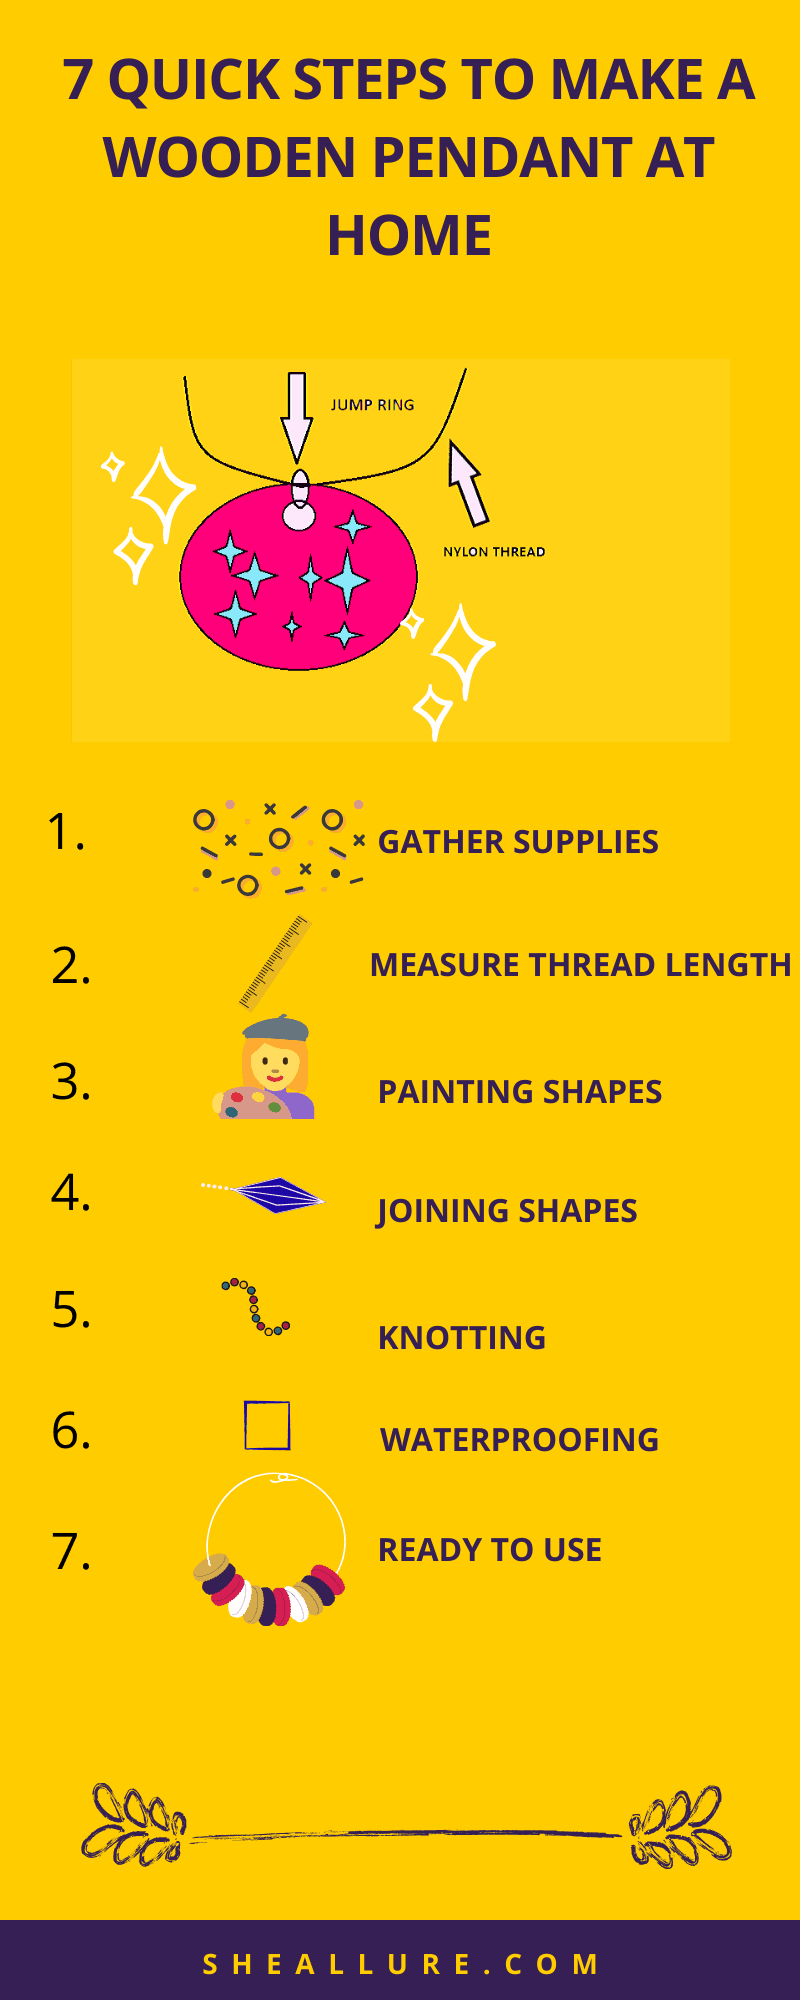
Let me guide you seven quick steps along with explanatory visuals you should keep in mind.
7 Quick Steps to DIY Wooden Pendant
| Step 1: Gather Supplies |
| Step 2: Measure Thread Length |
| Step 3: Paint Wood Shape |
| Step 4: Connecting Shapes |
| Step 5: Knotting at the end |
| Step 6: Waterproof Wooden Pendant |
| Step 7: Ready to Use |
Step 1: Gather all supplies
To begin making a wooden pendant, let me list out essential supplies for you.
- Wood Shapes
- Wooden Beads
- Drill Machine
- Paint Brush
- Fabric Paint
- Nylon Thread
- Jump Ring
- Glue
- Varnish
Step 2: Measure Thread Length
Measure the length of the nylon cord accurately around your neck to wear it easily. This is the most vital step every DIY jewellery artist must know and ensure that a thread is not too loose or tight for the wearer.
Step 3: Paint Wood Shapes
Take a wood shape and make an outline design using a pencil. Start using colorful shades and paint it all over. Similarly, you can color the beads and keep adding beads onto the thread to enhance their look. Let it dry for some time
Step 4: Joining Shapes
Once your design is ready the next step is to connect the jump ring into the hole. Here it goes, Insert nylon thread through the jump ring using a needle or a skewer.
This will allow the pendant and a thread to stay in one fixed position that is why we use a jump ring.
Step 5: Knotting at the end
Now comes the super important part of jewellery making is – Knotting at the end. Knot at least twice and hide it using a bead. This won’t let the bead drop off.
Step 6: Make your wooden pendant waterproof
Use varnish and gently apply on to pendant in small amounts. As a DIY jewellery artist, we must accomplish this step to avoid wooden pendant getting tarnished. Varnish allow it to shimmer and make it completely waterproof.
Step 7: Let your wooden pendant dry
Let it dry for at least 24 hours. Your wooden pendant is now ready to wear. Make your unique style statement and inspire the world.
Learn Wood Engraving to Make Enticing Pendant
Wood engraving also referred to as carving for jewellery and is mostly seen as an inconvenient part for DIY Jewellery designers but trust me once you learn you will slay it.
Make something outstanding with your own imagination. By the way, if you want to learn wood engraving I have written a blog which will help you to understand the whole procedure.
As a DIY jewellery artist, we must conceive ideas that will make a huge global presence in the market. That is why it is essential to learn wood engraving at home. Your ideas will change the world. Carve and Have fun!
Why You Should Never Miss Sanding Wood?
If you want to become an expert DIY wooden jewellery artist, you must understand the intricacies of the sanding wood process that gives a perfect finished look to the wood shapes.
Sanding is the process to finish off smoothing wood carvings using fine sandpaper that can be purchased online or from the local market.
This process requires patience and great attention to detail. Use 150 grit sandpaper to begin, rub wood shapes continuously until the scratches are entirely removed.
3 Amazing Ideas to Make Indian Style Wooden Pendant at Home
How to make a wooden pendant at home – in 3 unique ways? Has this question ever crossed your mind? Well, let me tell you, friends, this is the most interesting idea discovered by me and I am sure you guys will love it. Today I am going guide on how to make a wooden pendant in 3 innovative Indian styles i.e
- Ethnic Style
- Fabric Style
- Contemporary thread style

Make an Authentic Indian Style Wooden Pendant at Home
Being an Indian and I take pride in sharing some traditional ways on a wooden pendant. I love producing new ideas the define me as a DIY jewellery artist.
Crafting a wooden pendant at home breaks my monotony and makes me cheerful all day. I am a beginner who is still learning, therefore I would like to share some tips to make a glitzy handcrafted wooden pendant at home.
9 Essential Supplies to make a wooden pendant
For making an ethnic style wooden pendant you will use the same materials listed above and add new supplies to your bucket list. Let me help to list out things for you-
- Wood Shapes
- Wooden Beads
- 3D Emboss Paint
- Sparkles or Crystal beads
- Fabric Paint
- Nylon Thread
- Jump Ring
- Glue
- Varnish
Gather all the supplies and follow the same process as shown above except one step that needs to be tweaked out is the designing phase. Use your imagination and make your exclusive designs.
In addition to this, I would suggest you add small crystal beads or sparkles to make it a more appealing and aesthetic look.
Can We Use Fabric To Make a Wooden Pendant?
Did you know you can use cotton fabric to make a beautiful wooden pendant at home? That’s how we innovate ideas by reusing materials that are easily available at home. You can reuse old cloth or lace for crafting.
- Gather Supplies
To make a fabric style wooden pendant, supplies are the same listed above all you need is a scissor and cut a piece of cloth into the desired shape in order to encompass to a wooden pendant.
- Outline Wood Shape and Paint
The next step is sketching, make an outline with a pencil and redo it with a black sketch pen. Use a thin paintbrush and play along with different shades. Let your wooden pendant dry for some time.
- Add Fabric to the Shape
Cut desired fabric shape as per your choice. Drop glue to the wood shape and stick the fabric shape to it. Let it dry for few seconds.
11 Most Commonly asked FAQs to Make Wooden Pendant
| Q1. Why is the purpose of making a wooden pendant and not other materials? |
| Ans. Wooden pendant is one the most cost-effective, light-weighted, non-irritable material for the wearer. You can make it for yourself or for business use and earn decent profits by selling them online. Materials like gold, silver are costly hence the idea is to make an eco-friendly inexpensive pendant. |
| Q2. What kind of paint we should use for wooden pendant? |
| Ans. Fabric paint is best for making stunning designs on a wooden pendant. |
| Q3. What is the alternative of nylon thread? |
| Ans. You can use gold or silver chains instead of thread but they are slightly costly compared to threads. My advice is to use materials that are not too cheap or costly. Use a quality thread for making a wooden pendant. |
| Q4. Why Sanding is an important step of wood engraving? |
| Ans. Sanding is the most crucial step in the wood engraving process for smoothening uneven edges and blemishes and produces a finished look. For any professional jewellery artist, the end goal is to make a finished product that is why we use quality sandpaper. |
| Q5. How long does it take for varnish to dry? |
| Ans. Varnish will take at least 24 hours to dry. So please have patience. |
| Q6. Where can we buy a fine quality Sandpaper? |
| Ans. You can easily buy from the local market or through Amazon. |
| Q7. Why Jump ring is required for making a wooden pendant? |
| Ans. A jump ring is used to connect components of a wooden Pendant. It is placed into the hole of the pendant. |
| Q9. Which type of wood should we prefer for making wooden pendant? |
| Ans. Balsa wood is a preferred wood type that is soft and light-weighted. |
| Q10. How to prevent paintbrush from hardening? |
| Ans. Apply turpentine oil to the paintbrush using a cotton cloth. |
| Q 11. Can we purchase ready-made wooden supplies? |
| Ans. Yes, you can purchase ready-made supplies through Amazon or from the local market. |
I hope you enjoyed reading my blog and got clarity on the question “how to make a wooden pendant at home”. Make your own eye-popping designs and showcase your talent to the world.
Do share your thoughts, ideas, or suggestions in the comments section. I would love to see them. Thank you.
