“How to make wooden jewellery at home” is one of the first questions crossing the mind of an individual who is just getting started with jewellery making at home.
Well, making and crafting wooden jewellery at home is one of the most innovative, cost-effective and eco-friendly ideas that can be implemented.
As a DIY Jewellery Designer, I began making wooden jewellery with a bracelet. After that, there was no looking back. I’m still learning and adding to my collection.

How to Make Wooden Jewellery at Home in 2020?
Wooden jewellery is light-weighted, comfortable and boho in feel. Therefore, it is currently trending in the fashion and accessories industry across the world.
I personally feel so inspired to observe punky women wearing wooden bracelets, danglers, anklets and what not. Therefore, I took it upon myself to design my collection myself.
5 Vital Points for DIY Wooden Jewellery Beginners
As an DIY Jewellery designer, the methodology of the process is important for me. Hence, I would like to share the same with my fellow jewellery artists who’re just beginning to make wooden jewellery at home.
Ideating – Because your thoughts are the key to creativity
It is said that ideas transform the world. Well, I completely agree on this stance for wooden jewellery making as well. The first aspect of the whole process is to ideate i.e just think of ideas that you would want to turn into real pieces later.
Forging – Getting those fancy shapes is important
Once you have the exact idea implanted in your head, you should straightaway go after the shapes of your design. Whether you buy ready made cut shapes from the market or cut them yourself, forging is the way forward after thinking of a creative idea.
Designing – Well, isn’t this what we’re here for as Wooden Jewellery Artists
Now that you have the idea and the shape cut outs ready, its time to design. You know while ideating itself if you think harder and keep noting the exact look of your wooden jewellery, it will make it so much easier to design it later. So try it.
Polishing – Allow your wooden jewellery to shimmer
Polishing is done once the jewellery is designed. However, this is an optional process point. A lot of people skip it. But if you’re the kind of person who likes to take things to completion, I insist you polish your wooden jewellery. Always nice to give it that extra shine.
Showcasing – Display your lovely hand made wooden jewellery to the world
Just like polishing, most people just design jewellery and keep it in their closet for later use. But I like showcasing it properly. And, so a simple cardboard piece, or thickened glaze paper can be used to put your jewellery against it.
Now that you have the first set of process points clear, I can move on to the actual process of making wooden jewellery at home.
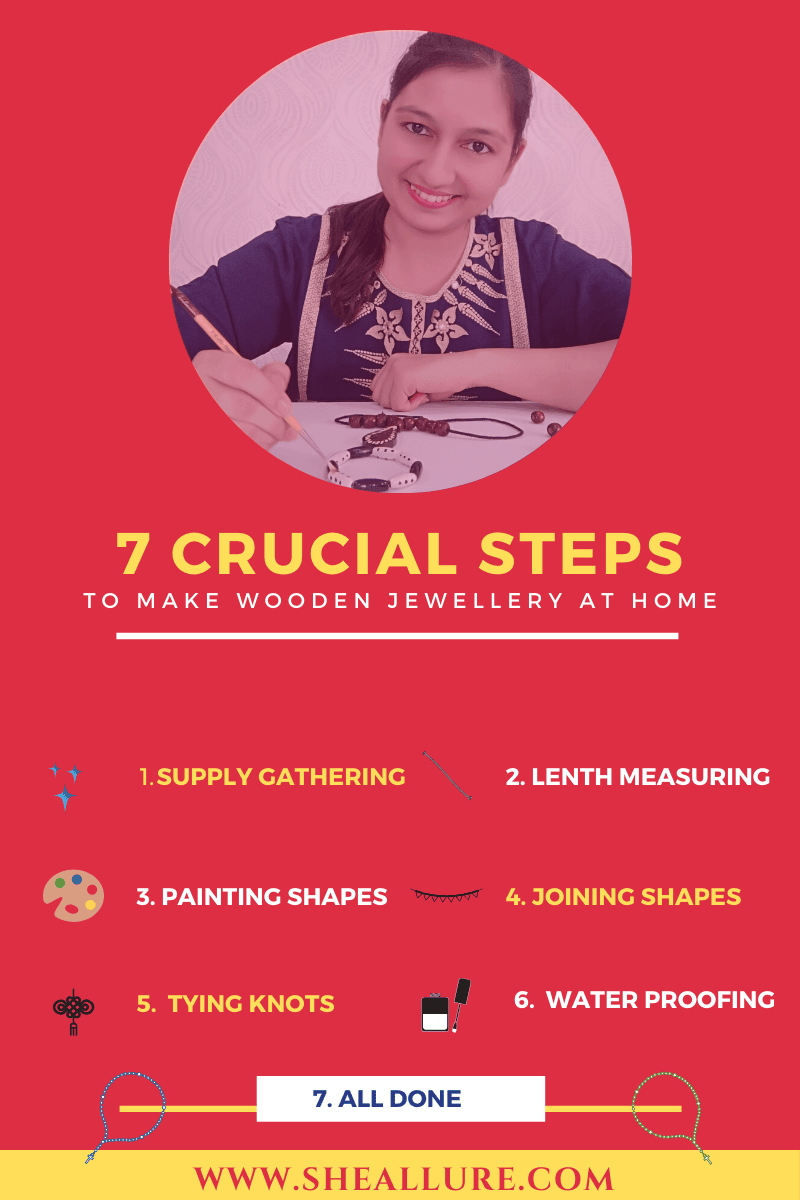
How to Make Wooden Jewellery at Home in 7 Crucial Steps ?
Every expert was a beginner once. And every beginner learns by means of methodical steps that lead the aspiring jewellery artist towards the path of success.
Therefore in order to help you learn the subtle art of wooden jewellery designing, I’m elaborating the 7 vital steps that will help you begin addressing the question, “how to make jewellery at home?
| STEP 1: Gather all supplies for making wooden jewellery |
| STEP 2: Measure the length of the string or wire required |
| STEP 3: Paint your shapes |
| STEP 4: Join the shapes with the string or the wire |
| STEP 5: Tie knots at the end |
| STEP 6: Make your jewellery waterproof |
| STEP 7: Let your jewellery dry |
STEP 1: Gather all supplies for making wooden jewellery
For any crafts person to be successful, it is important to stay organised. And therefore, the first crucial step in this regard is to collect all the material and supplies needed for making wooden jewellery at home.
If they’re already available at home, good. If not, buy them from the nearest market days before you get the process started.
STEP 2: Measure the length of the string or wire required for making jewellery
Whether you decide to use a string, a wire or any fancy tying material, make sure to measure the exact length. The final wooden jewellery should not be too loose or too tight for you. Measuring the tying material before hand will prevent this at all costs.
STEP 3: Paint your shapes that will later be the highlights of your wooden jewellery
If you’ve chosen solid beads as material for making jewellery at home, paint them. Otherwise, after you cut the wood and make shapes out of it, colour them.
This will make the design look very attractive. Just paint them and keep them in the sun to dry. Meanwhile finish all the other steps.
STEP 4: Join the shapes with the string or the wire
Once your shapes dry out, place them in the string to form a pattern.
In case you are using self cut out shapes, then you will need a proper tool to drill holes out of the shapes. Either way, a string will have to pass through so as to proceed to the next step.
STEP 5: Tie knots at the end to avoid dropouts
Whatever shapes you use, it is extremely important to make knots in the end. Without these knots, the shapes or beads will just fall out.
This cannot happen and so a knot will help you prevent the dropping out of essential material from the main design.
STEP 6: Make your wooden jewellery waterproof
Although a lot of people, skip this step, I highly insist you include it. Waterproofing jewellery is super important.
This becomes even more significant if you want to sell your self made wooden jewellery commercially. Therefore, in order to waterproof, just apply a little varnish with the help of a simple paintbrush.
STEP 7: Let your wooden jewellery dry
Finally, it’s time to keep the jewellery dry in the sun or at any warm place in the house. This step might seem like unimportant but truth be told it is the finishing step to the whole process.
Therefore, it should not be ignored at any cost. Once your jewellery dries, try it on yourself and feel happy.
3 Smart Tricks to Carve Wooden Jewellery for Beginners
Carving wood for making jewellery is super easy and fun to work with. With a little effort and a pinch of creativity, you can make awesome designs for yourself and even sell them online, or offline to family and friends.
The one thing that is absolutely necessary for carving is to choose the right specimen or type of wood. I would recommend you use balsa wood or purchase blocks from the nearest hobby stores. It is light-weighted. Therefore, a preferable material for wood carving.
Before I begin to elaborate on the 3 steps to carve wooden jewellery at home, it is vital that I enlist the supplies needed to do the same.
Essential things required to carve wooden jewellery at home
Balsa Wood
Drill Machine
Carving Knife
Carving Wooden Jewellery at Home in 3 Step Tricks
Now let us finally proceed to the actual process of wood carving.
Trick 1
Take a paper and simply sketch the design of your choice for carving to give you an idea of how you want wooden pieces to look.
Trick 2
Take a wooden piece. Place that paper on to the wood. Draw a design on the wood and use a carving knife to carve your designs. Try experimenting with different shapes such as heart, triangular, circular, square-shaped, etc.
Trick 3
Use the drill machine and make a hole in order to use it for stringing the jewellery onto the chain. You can use normal string, thin jewellery wires, thick nylon cord, gold or silver chains for making variations.
Don’t Skip Wooden Carving of Jewellery – I say, Own it!
Making jewellery at home is like adorning yourself and creating something that is appealing and a professionally made masterpiece you can sell or gift to your loved ones. This is exactly why crafting it well is essential.
I’ve seen a lot of first time DIY jewellery designers get fearful of this entire carving process. I’d say alternatively, they do have the option of ordering ready made wooden carved out shapes. By the way, I’ve written an entire blog on wooden jewellery cutting at home for beginners. Hence, it will help you in learning and understand the process with ease.
But over time, you should definitely be sticking to making the carvings yourself. Else, how will you call yourself a DIY wooden jewellery designer. Right ? So don’t be afraid. Just keep learning – one step at a time.
How to Make Wooden Jewellery at Home in the Shortest Time ?
A lot of beginner DIY jewellery designers have this question,”Is it possible to make wooden jewellery at home within a day?” My answer would be simple and practical – Yes and No.
I’m saying ‘yes’ for the times when the designer has supplies like beads or ready made wooden shapes.In such a case, you will be able to make wooden jewellery within 24 hours.
However, when you are a beginner and have to go through the cutting process using tools, that will take slightly longer. After all, the end goal is to make wooden jewellery that is poised and so you might take more than a day to be able to achieve that result.
13 Common Concerns about Making Wooden Jewellery
As beginners, we will almost always have concerns before taking that first plunge and rightfully so.
Hence, there are a lot of concerns and questions that most of us share as newbie DIY Wooden Jewellery Designers. Therefore, I’d like to share them with you below with the intent of providing feasible answers.
| Q1.What kind of wood should we prefer for making jewellery?
Balsa wood is the best for making wooden jewellery. Reason being, it is soft, light-weighted and comfortable for the wearer. Most importantly, it makes it easy for cutting jewellery at home. Materials like oak wood are hard. Hence try avoiding them. |
|
Q2 Is it easy to cut wooden jewellery at home? No. It isn’t at first. In fact, you might find the whole process hard and tedious. Cutting wood for making jewellery at home may seem inconvenient at first. With the passage of time, however, it will get easy. Remember, you will not stay a beginner forever and so there is absolutely nothing to worry about. I was a beginner once. Therefore, I’m happy to share my insights on wood cutting at home. |
| Q3. What is the alternate method for cutting jewellery?
Alternatively, I can suggest you a new technique every DIY jewellery artist prefers today. And that is laser cut technology. It is more expensive yet very useful technology for cutting wooden jewellery. Also, a cheaper way would be to buy ready made wooden shapes and beads. However, I feel as a DIY individual, you have got to learn cutting wooden jewellery yourself. |
| Q4. How can we hide the knot?
Take a needle and gently put the knot inside the bead hole. This way, the knot won’t be visible. |
| Q5. What kind of wooden shapes we can use for making pendants?
Oval, Circular, Square, Tear Drops, Triangular and heart-shaped. |
| Q6. How long does a varnish takes to dry.
Varnish will take up to 24 hours to dry. |
| Q7. Should we use Resin Hardeners instead of Varnish?
For beginners, I would not recommend using Resin Hardeners. Reason being, they might harm your skin and you need to strictly follow safety precautions. Moreover, resin hardeners are difficult to use in winters because they become thick and release micro-bubbles. In order to counter these bubbles, you will need to maintain an ideal temperature of around 24 to 30 degrees. |
| Q8. How to prevent paintbrush from hardening?
This is a very important question post waterproofing process. Clean your paintbrush using turpentine oil and wipe it with a cotton cloth to prevent from getting it harder. |
| Q9. Do we require to cover the jewellery in order to dry it.
Don’t cover, let it dry as it is. This will help in drying up the jewellery faster. |
|
Q10.Which is the first wooden jewellery item to start with ? Start with a wooden friendship bracelet and gift it to a loved one. |
|
Q11.Can eye pins be used for making wooden jewellery at home ? Not just eye pins but all kinds of home based jewellery can be made using eye pins. |
|
Q12. What is the most credible online resource for ordering cutting and carving tools? You can easily get access to the huge variety of credible and authentic tools for making wooden jewellery at Amazon. The price margins are also great. Plus you can read tons of customer reviews before buying. |
|
Q13. What is the most credible online resource for ordering supplies? This has got to be Amazon. Every kind of supply needed for making wooden jewellery is available in there. |
I hope my blog has helped you address the question of “how to make wooden jewellery at home?” After learning how to make jewellery, you can craft so many designs using basic tools and make your amazing handmade collection at the lowest possible cost.
What say ladies? Feel free to share your thoughts and ideas in the comments. I would love to see your talent.
