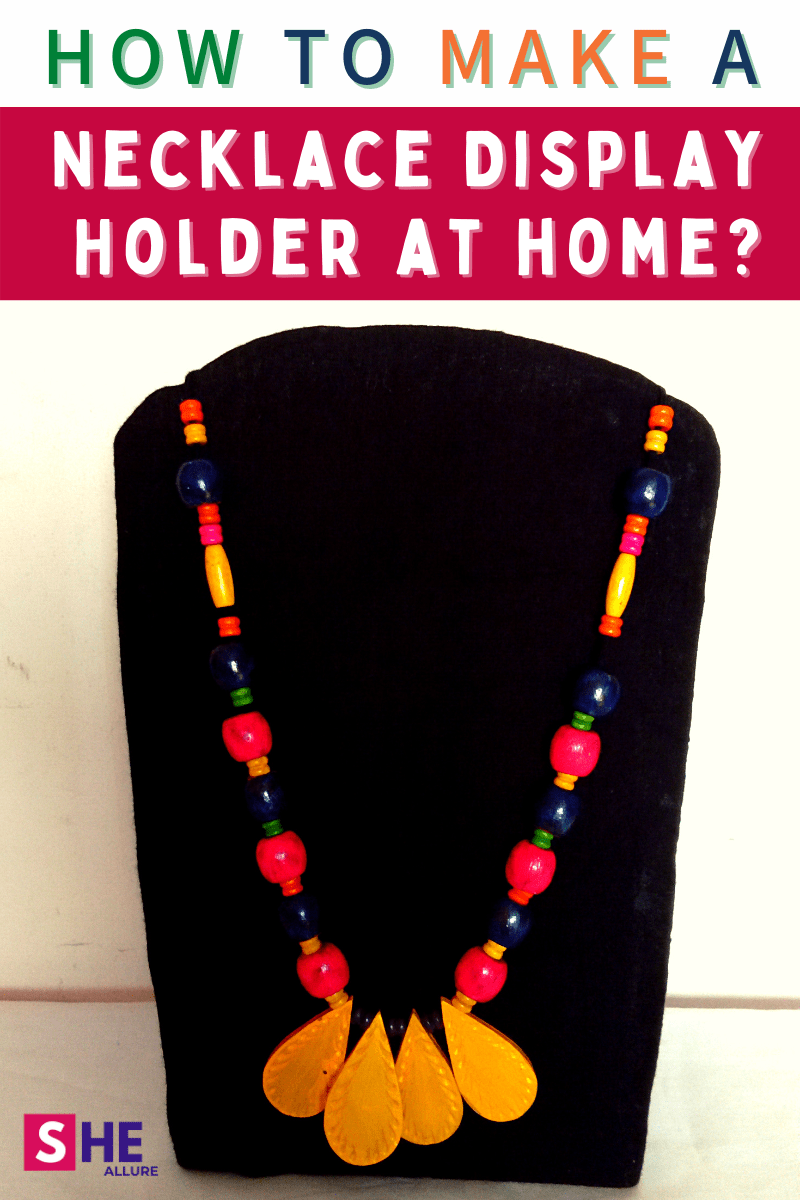
How to make a necklace display board using cardstock? For sure, it will save a lot of cost, less time-consuming, and easy guide for beginners.
A Necklace display board is an integral part to showcase and sell your ethereal handmade creations. And, let me tell you, this is one of the easiest and cost-effective crafts for anyone to try at home.
For making a necklace display board, you need to be considerate in terms of the exact length and size of the cardstock. Be ready to with your ruler, cardstock, and the rest I will jot down essential materials below.
How to Make a Necklace Display Board? 11 Easy Steps to Try at Home
How to make a necklace display board to showcase and sell your jewellery creations? Well, I must say, you don’t have to spend extra dollars for purchasing rather make it easily by reusing cardstock.
The display stand is mostly seen at jewelry shops that catch your customer’s attention and enhance the complete look of the necklace. This is why we as jewelry artists must-learn this craft. So, let’s begin with step-by-step instructions.
| STEP1. Gather Materials |
| STEP2. Make a Board Design on a White sheet of paper |
| STEP3. Cut sheet into the desired board shape |
| STEP4. Use a Paper cutter to cut thick cardstock |
| STEP5. Glue Black cloth into cardboard |
| STEP6. Cut 20” rectangular shape for Stand |
| STEP7. Fold about 5” cardboard from the top |
| STEP8. Cover stand with cloth |
| STEP9. Glue stand on necklace board |
| STEP10. Hang your Necklace to the Board |
| STEP11. Ready to display |
Make your own Professional Looking Necklace Display Board at Home | Just Follow these Simple Steps
To all jewelry makers and sellers, time to get more creative as I am gonna share with you detailed instructions to make a super attractive yet professional-looking necklace display stand.
First, gather all thick cardstock available with you and I’m sure you have them. They are a treasure for us, don’t trash them at all. Let me list out the required materials for you.
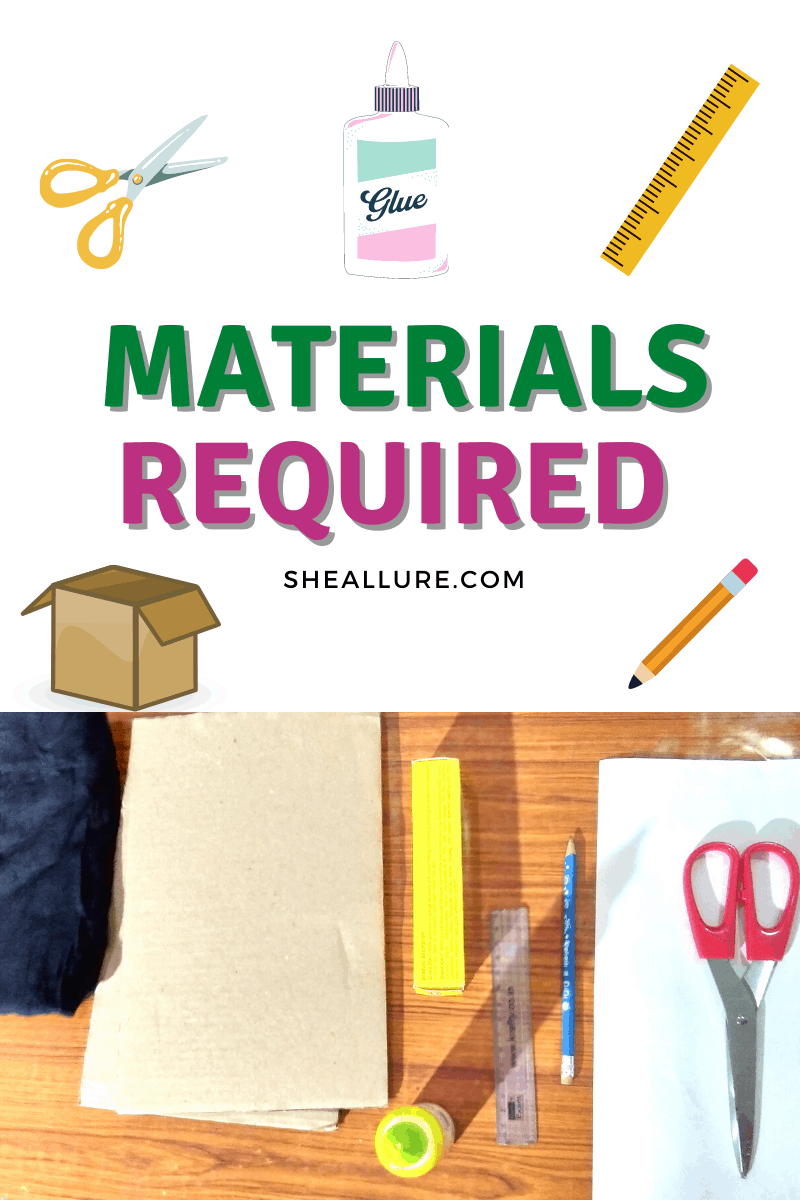
STEP 1. Gather Essential Materials
Note the following essential materials and gather altogether at one place to start.
| Cardstock Pieces |
| E8000 Glue or hot glue |
| Paper Cutter |
| Scissor |
| Cloth Piece |
| Pencil |
| Ruler |
| A4 Size sheet |
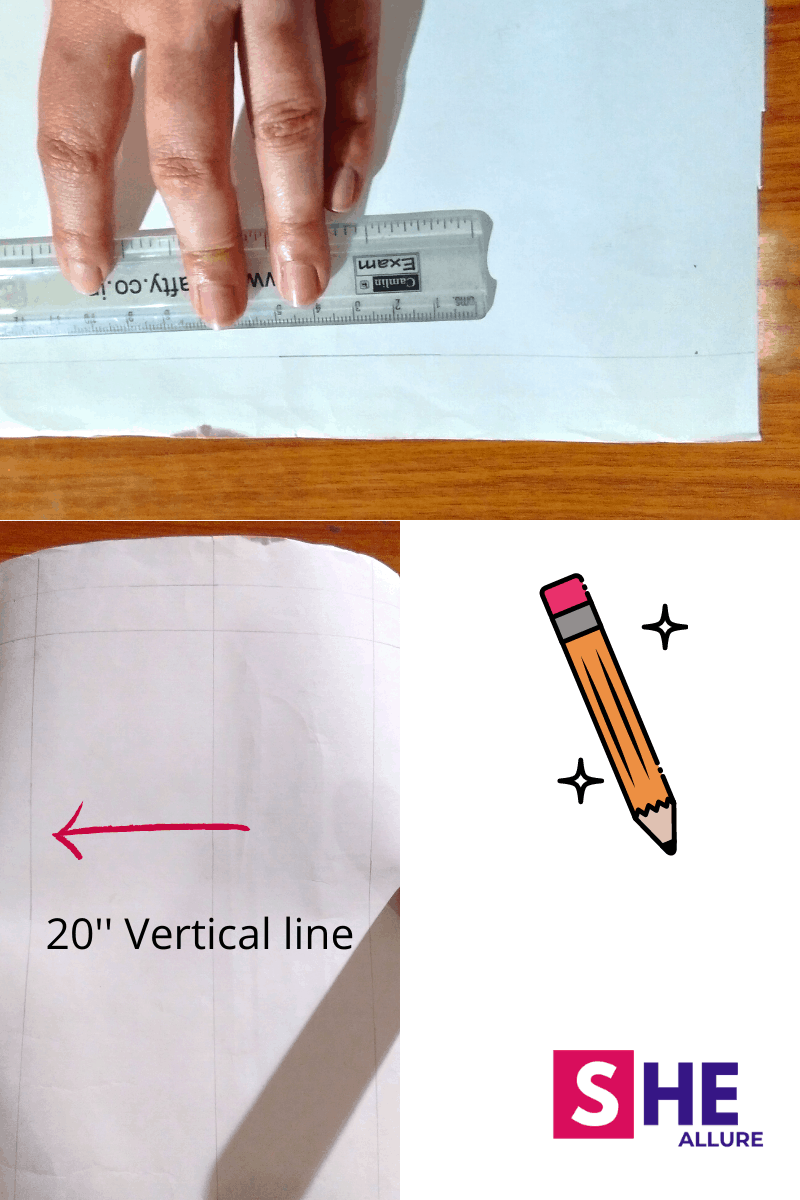
STEP2. Make a Board Design on a White Sheet
Take an A4 size sheet and draw about 20″ couple of slant lines on the sheet and two parallel lines (1 inch each) on the top. Let me show you with a help of an image.
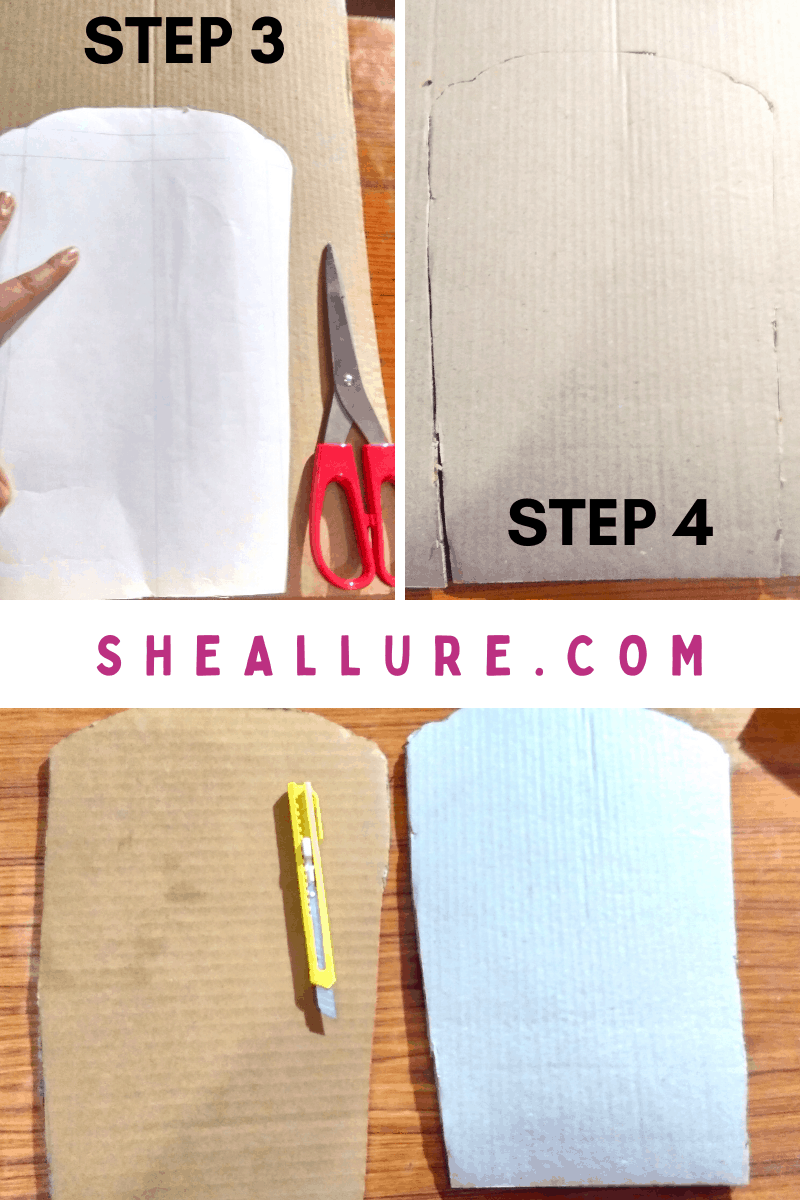
STEP3. Cut sheet into the desired board shape
Start to cut the sheet using a scissor into the desired board shape. This is an important step to get a similar shape of a cardstock.
STEP4. Use a paper cutter to cut the cardstock
Place the cutout sheet on the cardstock and trace the similar shape using a pencil. Finally, use a paper cutter to cut cardstock to the desired shape.
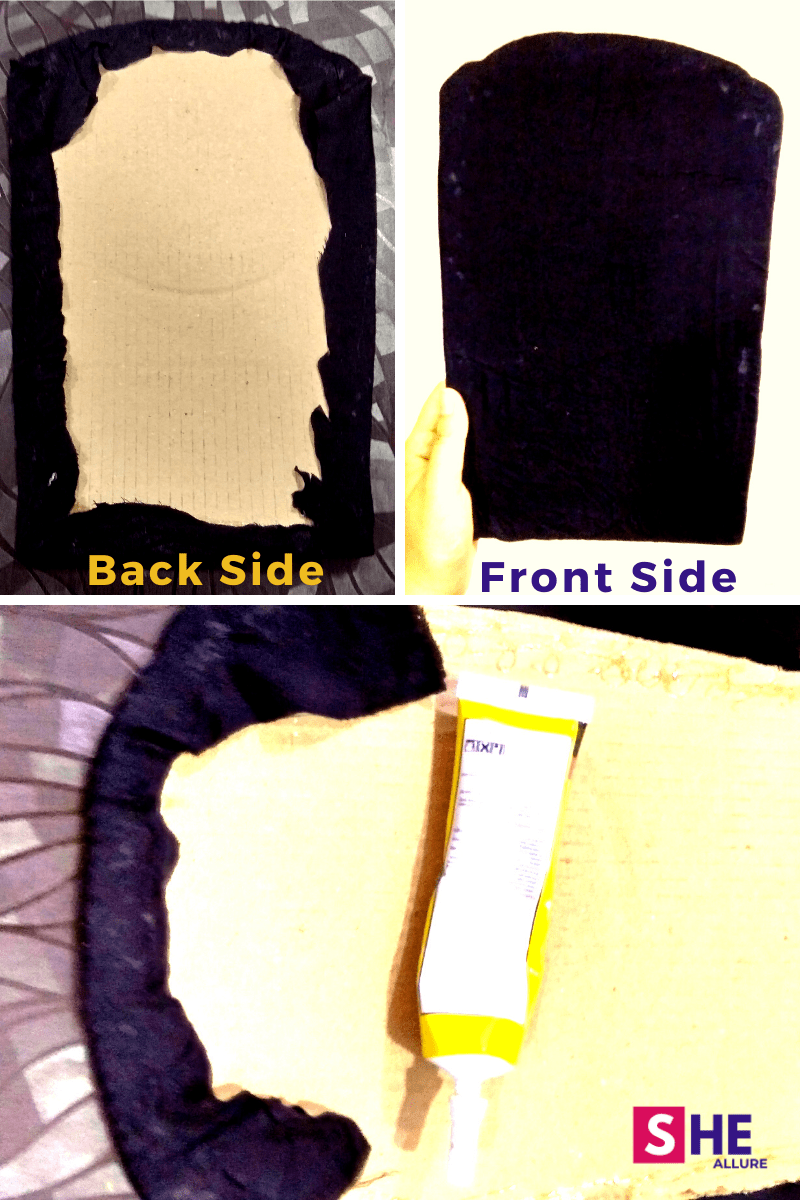
STEP5. Glue Fabric into the Board
Now, coming to the crucial step, use E8000 glue at the boundaries of the cardstock shape and place a black cloth on the front side also covering the backside too. By the way, you can also use a white cloth, it’s completely your choice.
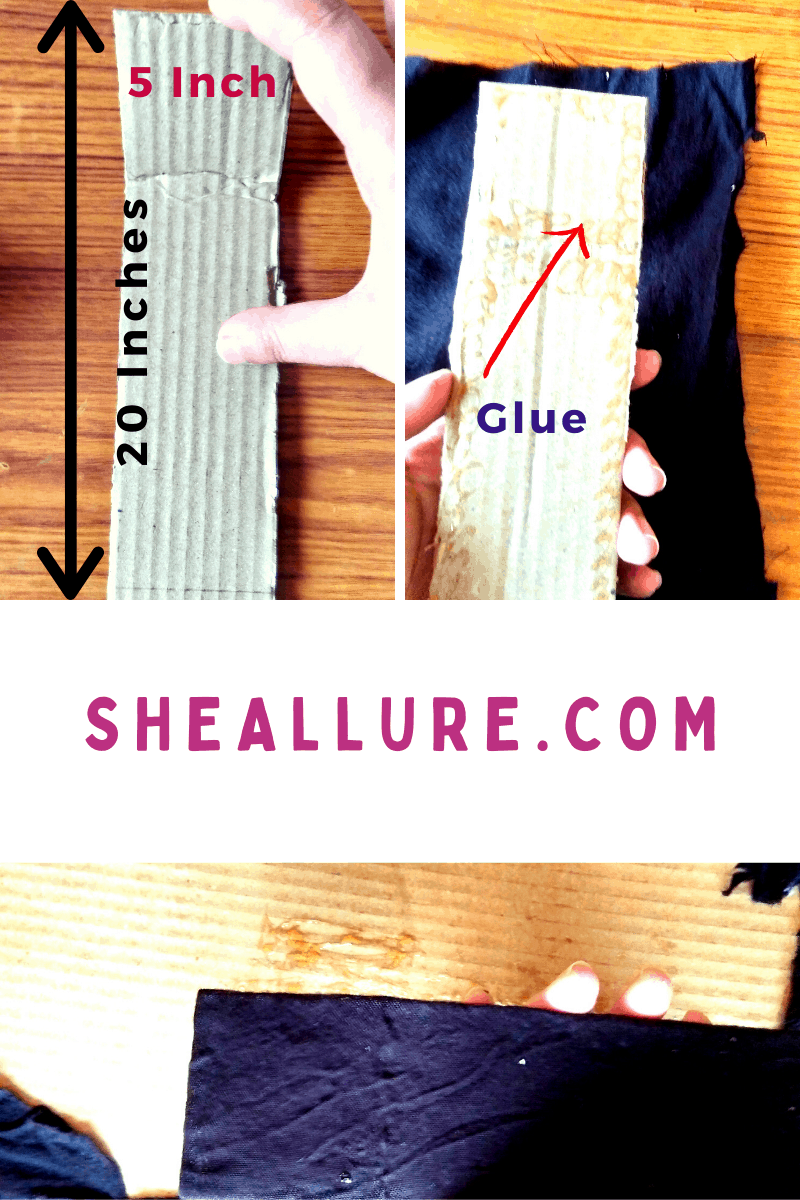
STEP6. Cut 20″ Long Rectangular Shape for Stand
Cut 20″ long rectangular shape to make a display stand at the backside. This is an extremely important step.
STEP7. Fold about 5” cardboard from the top
Another crucial step is to fold about 5″ from the top and make it flexible. Make sure you don’t fold it too much so that it won’t get torn out completely.
STEP8. Cover stand with a cloth
You need to wrap the black cloth around the stand completely and glue the ends. Alternatively, you can just staple the leftover cloth instead of gluing it. Just a suggestion.
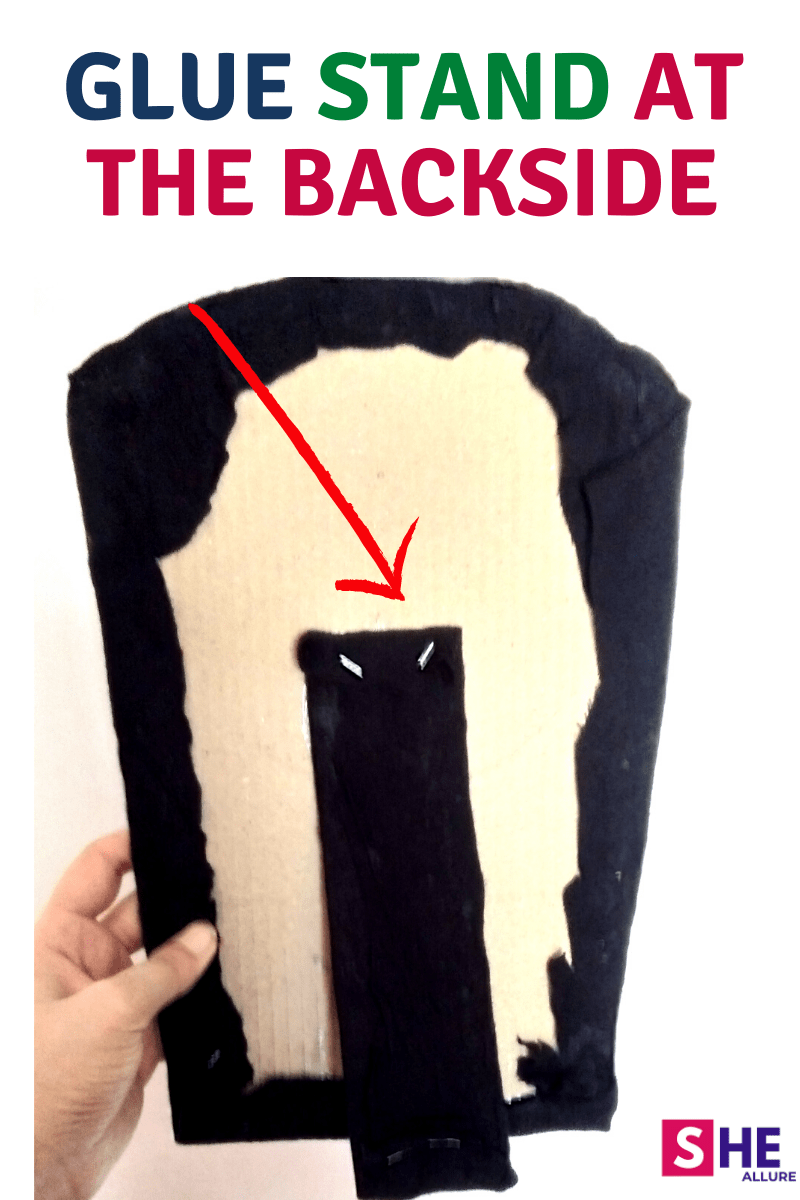
STEP9. Glue stand on necklace board
Once you’re done with cloth wrapping, finally glue the stand at the backside of the board and to the central point. Allow the glue to completely dry.
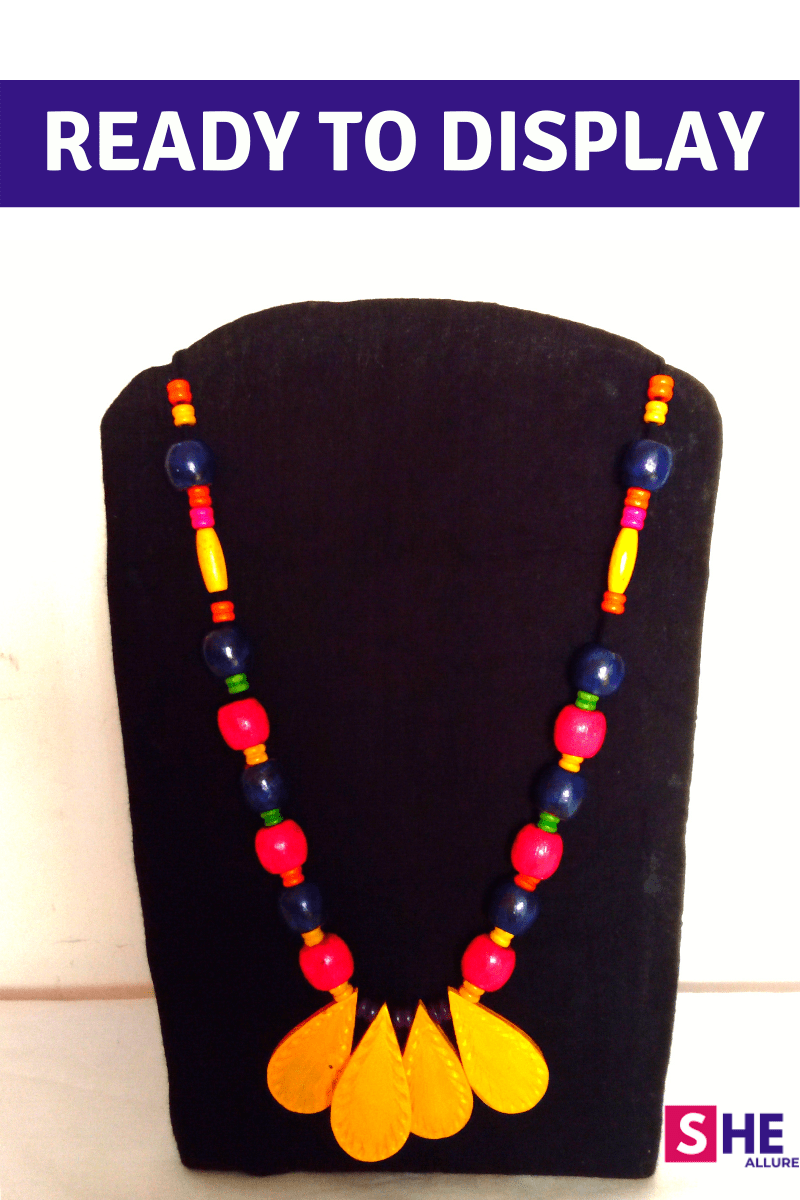
STEP10. Hang your Necklace to the Board
Finally, your display stand is all done. Just hang to your handmade necklace for selling. This amazing stand leaves a lasting impact on your customers to make a purchase.
STEP11. Ready to showcase and Sell
Your necklace display stand is now ready to showcase. Start decoring your pieces of jewelry using reused cardstock and you’ll save a lot of money.
DIY Frugal Ideas to Make Jewellery Organizers at Home | Reuse, Repurpose, and Stay Organized
If you are tired of putting all your handmade creations into one single box, let me give you some fantastic ideas to repurpose old items to declutter things and make beautiful jewellery organizer at home.
Well, let us think differently and unleash new ideas to organize, showcase and ultimately sell your handmade creations. The ideas are endless, let’s execute them today and start earning.
-
Thermocol
Why waste money on purchasing new stuff when you have such treasures at home? Let us use the same technique I have explained in the above tutorial and make a display board out of it. Try this one and do share your experience with me.
-
Reuse Wooden Planks
The best way to reuse wooden planks is to hang them to your wall and attach hooks to it. Just hang your necklace creations to the hooks and see how it looks well organized and decluttered
-
Repurposing Old Hangers are just perfect and easy
If you have a lot of cloth hangers, why not use them as jewelry organizers? Just add small hooks and hang your necklaces to them. I think that’s the perfect and easy way to organize your handmade jewelry.
That’s not all friends, just give it a look to the amazing DIY platform – Spruce Crafts that gives you eight fabulous jewelry organizing ideas.
-
Repurposing Old Photo frames
This is one of the best ideas to try at home. Many of us have photo frames and if they are no longer in use why not make nail them to the wall and use it for showcasing your necklace collections?
All you need to do is to hang them and add some hooks in a row. Whether you’re selling from home or having a jewelry shop, this one is the best choice for selling purposes.
-
Tree-like Wooden Hangers
Natural wooden sticks can be turned out into mounted wall hangers for displaying necklaces and pendants. Create amazing jewelry organizers with the help of tree-like thick wooden sticks.
Just wrap a thick cord at both ends of the stick and hang them on your wall. Add some hooks and hang your handmade jewelry or displaying purpose.
-
Repurposing Old Windows Frames
Do you know how old window frames can be repurposed to necklace displays? Well, think again before you trash them, it’s super useful for displaying your handmade jewelry.
Significance of Making Homemade Necklace Displays Every Entrepreneur Must Know
If you ask me why it is important to make beautiful displays instead of purchasing outside, my subtle answer to this question is to save money and it’s best to use your imagination and make things on your own.
After all the path of success lies with doing things on your own. Hence, if we make stunning jewellery pieces then why not display boards? The ideas are endless and that too from the old stuff that is usually thrown away. Avoid it and start making them today.
Where can we use these Display Boards?
Now, this is a very interesting question especially for beginners to understand it’s importance. Let me give a brief list of places to showcase your necklace designs.
- Trade Shows
- Storefront Displays
- Online Selling Purpose
- Professional or Casual use
Whether it’s craft shows, auction, jewellery shops, making homemade displays are super important to show off your creations and making it easily accessible for your customers to buy your product.
What say, people? Are you up to make your own homemade stuff? Let’s go the extra mile and make our own jewellery displays.
I hope you’ve liked this tutorial and ideas, start making your own stuff and do share it with me. I would love to get inspired. Till then, Happy Crafting and stay tuned for more super cool money-saving ideas.