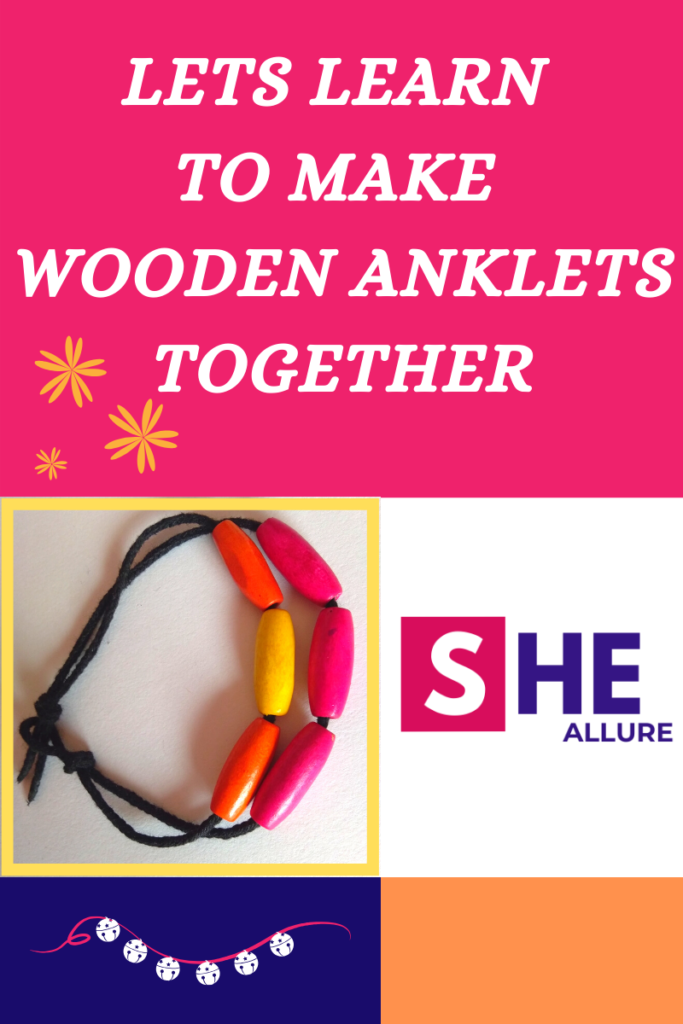
Beginner Guide for Making Wooden Anklets is one of the popular craft every DIY jewellery artist must be acquainted with and a perfect gift idea purpose as an expression of love.
Today, I will provide one of the easiest and creative ways to make wooden anklets at home and amazing insider tips in this tutorial you’ve always waited for.
There are ten crucial steps to make a simple homemade beaded anklet at home and I will also teach you how to make layered beaded anklet in the shortest span of time.
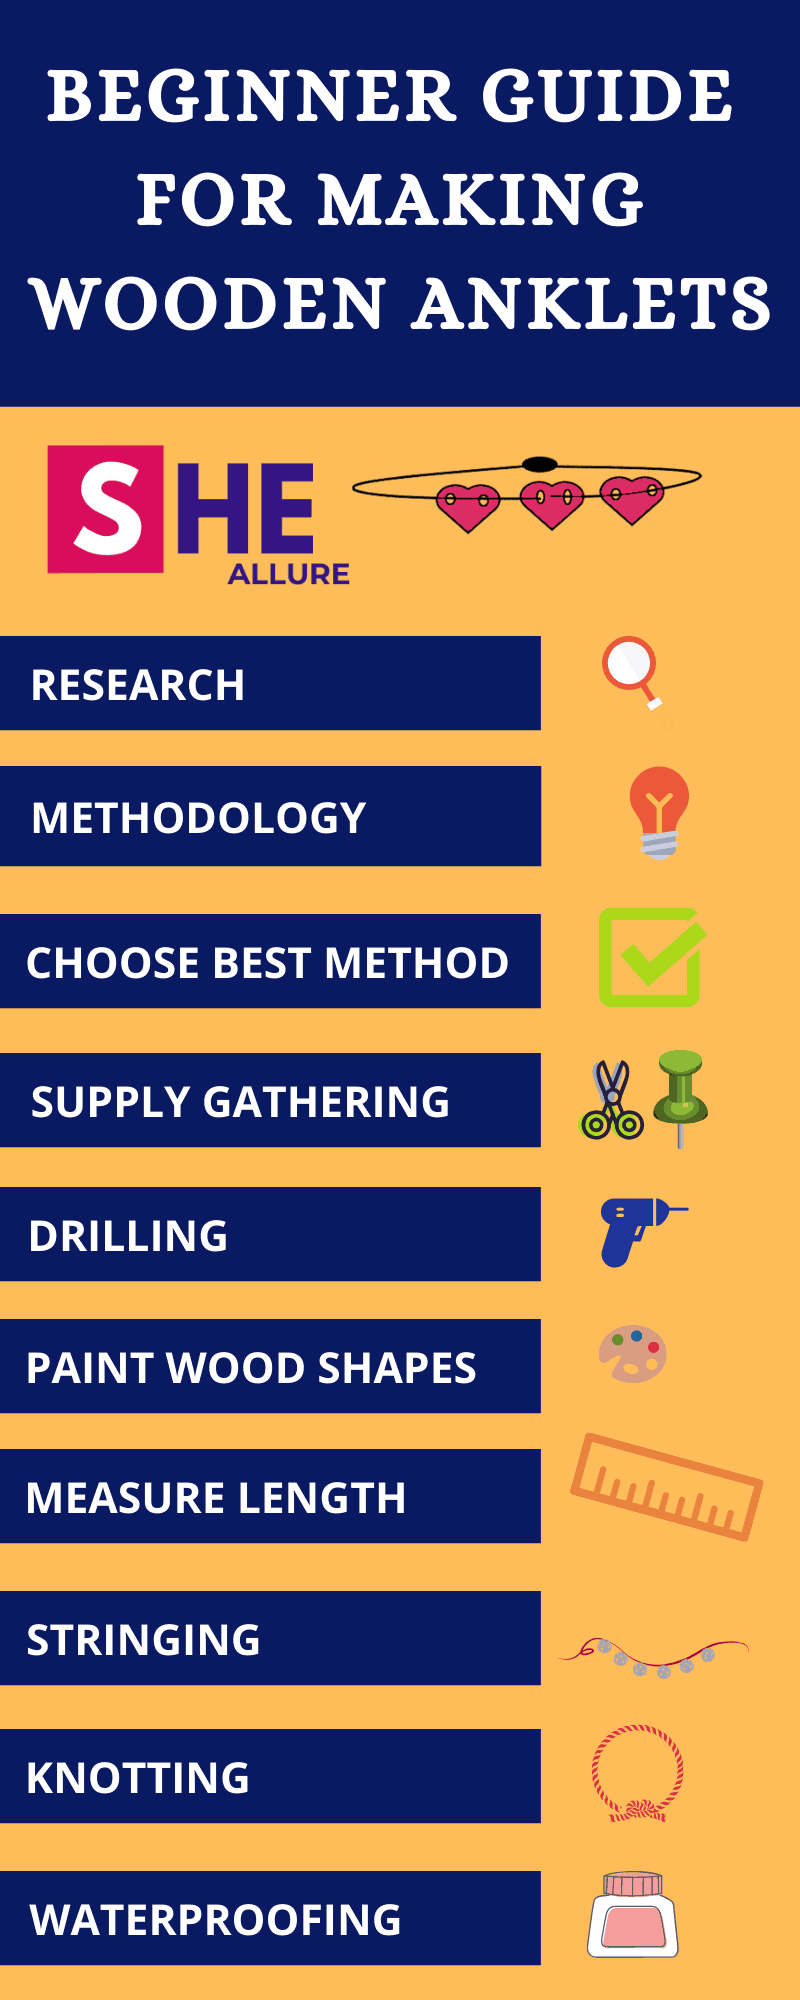
Beginner Guide for Making Wooden Anklets | 10 Crucial Steps
Beginner guide for making wooden anklets is specially designed for newbies who have never tried their hands in jewellery making. The following steps will give you the confidence to make your own masterpieces at home. Let’s begin.
| STEP1. Research on Trendy Anklets |
| STEP2. Implement Basic Methodology |
| STEP3. Choosing Best Method |
| STEP4. Gathering Supplies |
| STEP5. Drilling Holes |
| STEP6. Painting Wood Shapes |
| STEP7. Measure Thread Length |
| STEP8. Stringing to Make an Anklet |
| STEP9. Knotting |
| STEP10. Waterproofing Wooden Anklet |
Step1. Strenuous Research on Trendy Anklets
Research on current jewelry trends and try to imbibe and make your own original masterpiece at home. Plan a beautiful anklet design or a digital layout before you begin making an anklet.
Step2. Implement Basic Methodology
There are five vital points to keep in mind – Ideation, forging, designing, polishing and showcasing. Proceed with making a lovely wooden anklet design on a paper or a digital layout.
Step3. Choosing the Most Feasible Technique
In order to make wooden anklets, you will require wood shapes or slices that are smaller in size. So now we understand the three most important woodcutting techniques for making beautiful anklets.
- Get Access to Laser Cutting Technology: Get fancy wood shapes to make beautiful anklets with laser cutters. You don’t have to own it, look for the places where this amazing technology is used and get access to it.
- Get Wood Shapes from a Carpenter: Get custom-made fancy wood shapes from a carpenter such as oval, triangle, heart-shaped etc.
- Buy Readymade Wood Shapes: One of the easiest ways to make homemade wooden anklet is buying readymade supplies from the local crafts store or online.
Step4. Supply Gathering
Supply gathering is the initial stage for crafting handmade wooden anklets that should be thoroughly noted by beginners as well as experienced professionals.
- Wooden Heart Shapes (Thin and Small Size) or Wood Beads
- Drill Machine
- Nylon Thread
- Paint Brush
- Acrylic Paint
- Varnish
Step5. Drilling Holes
Drilling holes on the wood shapes is an important step to allow your thread to connect with wood shape. The first step is to mark two points at the ends of the wood shapes to allow thread pass through the holes to make an anklet.
Step6. Painting Wood Shapes
It’s time to use your imagination and play with colors. This is one of the most fun parts of making jewellery as you can make colorful shades of your choice.
Step7. Measuring Thread Length
For crafting wooden anklets, you can either use a nylon thread or chains.
Measuring the length of your thread is the most important step to make a wooden heart anklet. Note that the size of your anklet should be moderately measured in a way that it’s not too loose or tight for the wearer.
Step8. Stringing Wooden Shapes
Insert nylon thread into the holes of wooden shapes and beading. That way you can do the stringing and make stunning wooden anklets. To understand this step graphically, you can read my recent blog on how to make wooden heart anklets at home.
Step9. Knotting at the End
Knotting is the most crucial part every DIY jewellery designer must know. Knotting should be done at least twice at the end in accordance with the size of your ankle.
Step10. Waterproofing
Make your wooden anklets waterproof with the help of varnish. Use a thin paintbrush and apply it to wood shapes in small amounts. Let your anklets dry for at least 24 hours.
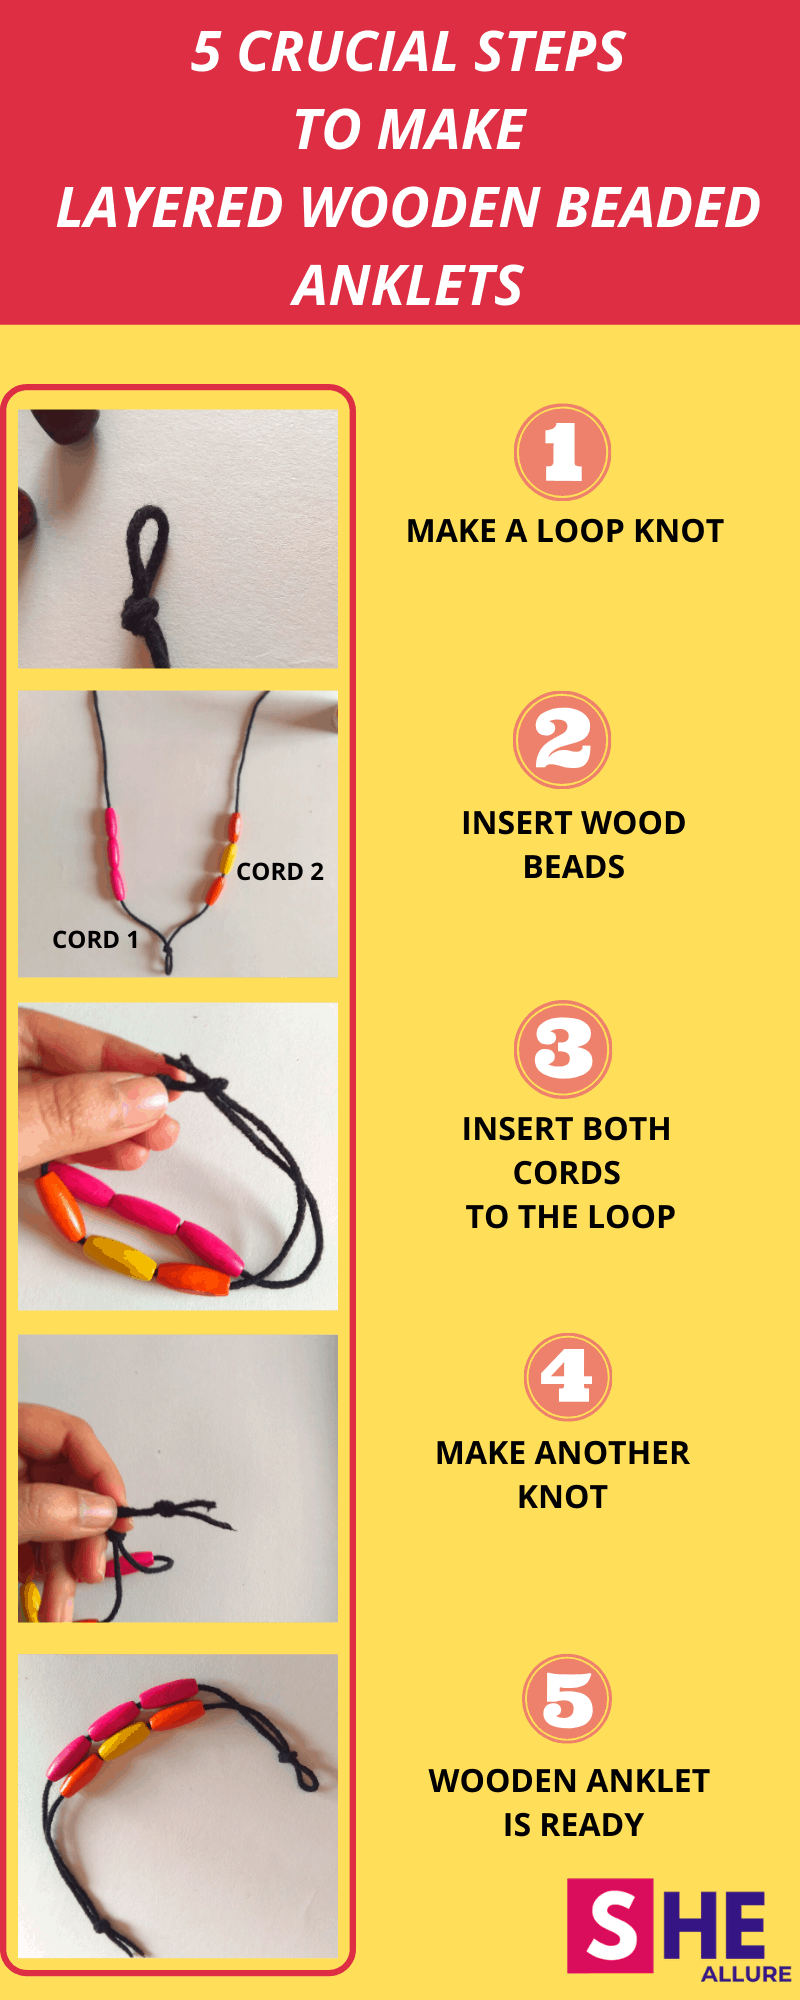
5 Simple Steps to Make Layered Wooden Beaded Anklet
To all creative minds and professionals, I am going to share a very simple and easy tutorial to make handmade wooden beaded anklets in minutes along with images for better clarity.
Materials Needed for Making Funky Beaded Wooden Anklets
You will need four essential supplies to get started.
- Nylon Cord (50 to 55cm length)
- Wood Beads
- Glue
- Pearls/ Beads (Optional)
In this tutorial, we need to ensure Knotting has to be done very effectively. Let me show you with simple steps. Take a quick look.
Step1. Make a Loop Knot
Take a nylon cord (50cm) and make a loop knot. You will see two open cords. Apply a drop of glue at the ends of cords.
Step2: Insert wood beads
There are two cords as shown in the above image. Let me walk you through working with these cords.
Cord 1: Let’s work on the first cord, insert 3 beads (you can use as many as you like) to the cord and make a knot at the end.
Cord 2: Follow, the same procedure as mentioned above in the first cord and make a knot at the end.
Additional Tip: Post knotting process, you will observe extra knots are coming out. Insert a single bead and secure it by making another knot.
Step3: Insert two cords into the loop
As you can see above, insert both cords into the loop knot.
Step4: Make Another Loop Knot
Make another knot and put them inside the loop cord. This is done to make a sliding lock of your anklet.
Step 5: Decorate and Flaunt
Add embellishers to make your anklets more appealing such as pearl beads, glass beads or acrylic beads. Your charming wooden anklet is now ready to wear.
Adorning with Delicate Chain Style Wooden Beaded Anklets
Chain Anklets are taking the center stage and looks fabulous to your fancy feet. Let us inspire and make our own handmade creations.
So far we have learned with different wood shapes now we will be going to learn how to make homemade wooden beaded anklets. To begin with, the first step is to collect basic supplies such as gold or silver chains, wooden beads, hook connectors, acrylic paint, and varnish. Over and above you can also add small pearls as enhancers to make it a more attractive party look anklet.
The first step is to paint the wood beads and let it dry for few minutes. You can skip this part if you want to make it simple. The next step is stringing your chain to the wood beads.
Now comes the most crucial part is using hook connectors to lock your anklet. Hook connectors look like an “S” letter. Here, you will require two hook connectors and connect at both the ends of the gold chain and lock it.
Don’t forget to waterproof your wood anklets with the help of varnish and let it dry for at least 24 hours. Your stunning wooden anklets are ready to flaunt.
Apart from the chain style party wear wooden anklets, you can also try using a hemp cord which I have explained previously in my blog.
7 Most Helpful FAQs for Making Wooden Anklets
| Q1. How can we get readymade wooden shapes? |
| Ans. I can suggest two ways- One way is to look for places where laser cutting technology is used, you don’t have to purchase a laser cutter, it’s very costly. Get access and bring it on different shapes. Another two options are, getting designed shapes from a carpenter and purchase readymade wooden shapes from the hobby craft store or online from the Amazon store. |
| Q2. Where can buy those hemp cords for making wooden anklets? |
| Ans. Hemp cords can be easily purchased from the local market or from the Amazon store. Moreover, if you want to learn how to make wooden anklets using hemp cord can read my blog. |
| Q3. Where can we buy jewellery supplies? |
| Ans. I would recommend you buy jewellery kit from the local market or directly from Amazon store. Every professional craftsperson must have this full-fledged jewellery kit. |
| Q4. Please suggest the size of jump rings and hook connectors for making wooden heart anklets? |
| Ans. The size of the jump ring is 12mm and hook connectors 1.4inch. You can also buy them seperately from your nearest shop or online from the Amazon Store. |
| Q5. Which paint colors should be used for wooden anklets? |
| Ans. I would recommend you use acrylic paint colors which are easily available at craft stores. Alternatively, you can purchase online from Amazon. |
| Q6. Post waterproofing, how to prevent a paintbrush from getting hardened? |
| Ans. This is a very important question, to prevent your paintbrush from getting hardened, I would recommend you use turpentine oil and wipe it with a cotton cloth. |
| Q7. What is the accurate measurement length of a cord for making double anklets shown in this blog? |
| Ans. I would recommend more than 50cm of cord length. Reason being, the knotting process is done twice in the above tutorial. Therefore, take an inch tape and measure as 55 cm of a cord for correct ankle fitting. |
Friends, I hope this beginner guide brought some clarity for making wooden anklets. They are super adorable, easy to craft and fun. All you need is practice and master this amazing craft.
Being an ardent DIY jewellery designer, I sincerely believe in experimenting with new ways to make splendid jewellery collections. Hence, My latest handcrafted jewellery is Layered Wooden Anklets which I have thoroughly explained for beginners so that they can quickly learn, use their own innovative ideas and rise as entrepreneurs.
I have also elaborated a complete step guide consisting of some crucial points that’s a bonus to all designers who are beginning to learn and craft their own enticing collections. Plan, create and design your lovely crafts and inspire the world.
I hope you like this blog. Feel free to share your thoughts, ideas, and suggestions for me. Thank you and Happy Crafting!
